Building a CCC-Server
We use a local area network (LAN) to run the workshops in venues with little or no internet access. The heart of the LAN is the CCC-Server, and this section of the wiki deals with setting up a CCC-Server from scratch. The hard work was done by Lachlan Currie, with other steps gathered from various sources. This guide assumes an intermediate understanding and experience with linux.
The ccc-server is not intended for WWW public hosting!! It is made for use in the CCC workshops over a LAN and has not been secured for wider access, uses softwares that are not up-to-date!
Each CCC facilitator laptop used during the CCC-OPAL workshops has local copy of the CCC wiki installed, and a master version of the CCC wiki is kept at The Edge. If you would like help to make a CCC-server, contact us and come into The Edge for a visit.
Hardware
For regional workshops the CCC-server runs on laptop to make use of both with built in wifi and ethernet ports. We suggest a specification of i5 processor, 4gig Ram and 250gig hard drive, we use re-purposed HP elitebooks, models like the 8440p are good.
Software
To get the CCC-Server up and running we need to;
Install and configure our Operating System
Installing Apache, PHP and Dokuwiki and getting a copy of the CCC-wiki running.
To provides the best workshop experience we use a local repository mirror, cutting download times drastically.
Configuring the LAN using a DCHP server and DNS Server.
Operating System
This guide assumes you have a fresh install of Xubuntu 14.04 on your laptop. Check out Workshop 02 for a refresher on how to install the operating system. If you need an installer, check out how to make one.
The CCC Wiki
After testing most of the available options, we decided to use Dokuwiki. Dokuwiki is simple to edit, maintain and back-up. It doesn't require a database for installation and can be edited from any modern web browser. Most importantly, dokuwiki can be distributed freely and easily.
Apache Set-up
The web server is used to serve the local version of the CCC wiki and Ubuntu repository to connected computers during the workshop. The web server software (we are using Apache2) launches when you start the laptop and runs in the background. We also need PHP installed. Lets get started.
sudo apt-get install apache2 libapache2-mod-php5
No we enable Apache Rewrite module. This lets us use pretty URLs
sudo a2enmod rewrite
Next we need to set-up Apache. Lets edit our default configuration. We need to deny access to directories we want to keep secure in the main apache.conf file.
sudo nano /etc/apache2/apache2.conf
For directory /var/www/ replace
AllowOverride None
with
AllowOverride All
Restart Apache2 service.
sudo service apache2 restart
Make an index.html
Lets check our apache2 server is working. Open up your browser and enter
127.0.0.1
You should see the apache server welcome page -index.html- looks something like this.

We need to do simple webpage to redirect to our docuwiki install which we will make later on.
We will delete the old index.html then make our own.
sudo cd /var/www/html
sudo rm index.html
sudo nano index.html
Inside index.html you can use:
<html>
<head>
<title>Redirect to local CCC wiki</title>
<meta http-equiv="refresh" content="2; URL=http://10.42.0.1/dokuwiki/doku.php">
<meta name="keywords" content="automatic redirection">
</head>
<body>
Click to go straight to the <a href="http://10.42.0.1/dokuwiki/doku.php">ccc local wiki</a>
manually.
</body>
</html>
PHP Set-up
First lets install the GD library, which we need for using the PDF export.
sudo apt-get install php5-gd
We'll need to make a few modifications to our PHP5 settings to allow larger uploads and posts to our wiki.
sudo nano /etc/php5/apache2/php.ini
Look for these two lines and change them to at least 15M (15 megabytes)
upload_max_filesize = 15M
post_max_size = 15M
Use CTRL+w to search in nano
We then need to make sure php has enough memory allocated to run the upload scripts.
memory_limit = 256M
Install Dokuwiki
We have adapted it from the official dokuwiki instructions. You will need internet access for this step.
You can use the version of dokuwiki we used for the CCC wiki. Lets change into our www folder and download it from dokuwiki.org using the wget command.
  cd /var/www
  sudo wget https://download.dokuwiki.org/src/dokuwiki/dokuwiki-2015-08-10a.tgz
Then un-compress the file using tar.
sudo tar xvf dokuwiki-2015-08-10a.tar.gz
Then change the name of the extracted directory using mv (move) command.
The * in the first directory name is a 'wildcard' that matches all the letters and symbols between the - and the end of the directory name.
sudo mv dokuwiki-*/ dokuwiki
At this point, for a standard fresh wiki you would run the installer and start building your own wiki. In our case we are going to use the pre-built CCC wiki content so grab the latest version of the wiki from here.
It will be large - at least 300 meg so be patient with the download. When it is done, un-compress it.
sudo tar xvf ccc_*.tgz
copy it from your downloads to the your new dokuwiki directory.
sudo 'cp' -ar ~/Downloads/dokuwiki/* /var/www/dokuwiki/
We now need to change ownership permissions again so our web server (apache) has read and write permissions where we need it.
sudo chown -R www-data:www-data /var/www/dokuwiki
Finally we will make a link in our main web directory to dokuwiki.
sudo ln -s /var/www/dokuwiki /var/www/html/dokuwiki
Ubuntu Repository
Using apt-mirror
Apt-mirror is the tool we use to copy a mirror of the ubuntu repositories onto the CCC-Server. Lachlan has set it up to grab just the binary packages, not the source code, and to use a local Australian mirror http://mirror.aarnet.edu.au. Most of the disk space of the laptop is taken up by a local 'mirror' of the the main Ubuntu repositories. We discuss repositories in Workshop02.
First - do your apt update and install
sudo apt-get update && upgrade
Then install app-mirror
sudo apt-get install apt-mirror
Now we need to edit app-mirror's configuration to determine which packages to download. We want to ignore the
sudo nano /etc/apt/mirror.list
This is what ours looks like for using the Australian repository.
  ############# config ##################
  #
  set base_path    /var/spool/apt-mirror
  #
  set mirror_path  $base_path/mirror
  set skel_path    $base_path/skel
  set var_path     $base_path/var
  # set cleanscript $var_path/clean.sh
  # set defaultarch  <running host architecture>
  # set postmirror_script $var_path/postmirror.sh
  # set run_postmirror 0
    set nthreads     4
    set _tilde 0
  #
  ############# end config ##############
   deb-i386 http://mirror.aarnet.edu.au/ubuntu/ trusty main restricted universe multiverse
   deb-i386 http://mirror.aarnet.edu.au/ubuntu/ trusty-security main restricted universe multiverse
   deb-i386 http://mirror.aarnet.edu.au/ubuntu/ trusty-updates main restricted universe multiverse
   #deb-i386 http://mirror.aarnet.edu.au/ubuntu/ trusty-proposed main restricted universe multiverse
   #deb-i386 http://mirror.aarnet.edu.au/ubuntu/ trusty-backports main restricted universe multiverse
   deb-amd64 http://mirror.aarnet.edu.au/ubuntu/ trusty main restricted universe multiverse
   deb-amd64 http://mirror.aarnet.edu.au/ubuntu/ trusty-security main restricted universe multiverse
   deb-amd64 http://mirror.aarnet.edu.au/ubuntu/ trusty-updates main restricted universe multiverse
   #deb-amd64 http://mirror.aarnet.edu.au/ubuntu/ trusty-proposed main restricted universe multiverse
   deb-amd64 http://mirror.aarnet.edu.au/ubuntu/ trusty-backports main restricted universe multiverse
   #deb-src http://archive.ubuntu.com/ubuntu trusty main restricted universe multiverse
   #deb-src http://archive.ubuntu.com/ubuntu trusty-security main restricted universe multiverse
   #deb-src http://archive.ubuntu.com/ubuntu trusty-updates main restricted universe multiverse
   #deb-src http://archive.ubuntu.com/ubuntu trusty-proposed main restricted universe multiverse
   #deb-src http://archive.ubuntu.com/ubuntu trusty-backports main restricted universe multiverse
   clean http://mirror.aarnet.edu.au/ubuntu
Things you might want to change are the default download directory - currently its set to:
/var/spool/apt-mirror
Also the number of threads used by apt-mirror can be adjusted. I've lowered ours to 4 to keep the SLQ network folk happy.
set nthreads 4
Now run apt-mirror for the first time as sudo.
sudo apt-mirror
Let it run overnight, the initial download will take a while..
apt-mirror will use as much bandwidth as it can set by the number of threads , and the repos are large in size - at least 100gig!
Setting up Networking
Hosts and Hostname
First lets give our computer a new name for the network. Lets check the name with
hostname
You will be shown as whatever the name of your computer currently is, as set when you installed your OS. Mine is
edgeadmin-HP-elitebook-8420p
We will use edit our hostname file to change it too cccserver
sudo nano /etc/hostname
Next edit your hosts file.
sudo nano /etc/hosts
and where you see your old computer name, change it to your new name. For example mine was:
127.0.1.1 edgeadmin-HP-elitebook-8420p
Which becomes
127.0.1.1 cccserver
Time for a reboot to check these settings stick. Once you've rebooted, try a sudo command to see if the hostname and /etc/hosts are working.
Network Management
Next we'll customise our networking. Ubuntu networking can be confusing to set-up as there are two toolsets that overlap. Network Manager is the tool that lets use uses a desktop panel to connect to networks and is accessible on the top right of your desktop. it looks like this.

The other part is the command line ifconfig tool, Lets deal with this first.
First we need to find hardware MAC address of the ethernet interface we are using. You can do this with the command ifconfig and look for ethernet interface name

Now we want to assign the interface a fixed IP address and make it the gateway for finding (forwarding) to other networks. Type:
sudo nano /etc/network/interfaces
Then replace the contents with:
  # interfaces(5) file used by ifup(8) and ifdown(8)
  auto lo
  iface lo inet loopback
  auto eth0
  iface eth0 inet static
  address 10.42.0.1
  gateway 10.42.0.1
  netmask 255.255.255.0
Now our ethernet port has a static (fixed) IP of 10.42.0.1 1). - this is where you will find the CCC-server on the LAN
Network Manager
Now we need to turn on the DNS server by editing the configuration for Network Manager and remove the ethernet port from being managed by Network Manager.
You'll need to enter your own ethernet port hardware address (MAC address), which you can find using ifconfig again. It appears as HWaddr:

Now edit NetworkManager.conf
sudo nano /etc/NetworkManager/NetworkManager.conf
We will specify the dns server as dnsmasq , and tell the Network Manager to ignore the ethernet port - eth0 - as identified above.
This will disable the ethernet port for normal use - i.e. it can no longer be used for internet access
   [main]
   plugins=ifupdown,keyfile,ofono
   dns=dnsmasq
   [ifupdown]
   managed=false
   [keyfile]
   unmanaged-devices=mac:xx:xx:xx:xx:xx:xx
Where mac:xx:xx:xx:xx:xx:xx is the mac you've discovered earlier.
DHCP and DNS Server
A DHCP (DHCP stands for Dynamic Host Configuration Protocol) server assigns IP addresses and directs or routes network traffic during the local workshops. The CCC-server acts as a DHCP server to devices connected over the laptop ethernet port only LAN.
A DNS (Domain Name System) server provides links to (or resolves) requested network address.
Acting as a DHCP and DNS server means that the CCC-Server can administer the LAN, and convince all the computers in the workshop that it is the official Ubuntu repository. This means that when we are installing or updating software using apt-get on a workshop pc, we don't need internet access and can use our local mirror instead.
Ten or more computers all trying to pull down updates will break most Australian broadband connections, particularly in regional areas, hence the need for a local mirror.
Internet Sharing
If you have a wifi network set-up in your workshop venue, the CCC-server will be able to share this over the CCC-LAN. This comes in handy for venues that allow wifi connection only.
Please be aware that connecting all the computers over a single wifi network will slow access down and may blow download quotas.
DHCP Server
Next we need to install a DHCP server.
sudo apt install isc-dhcp-server
First we tell our DHCP server which interface to listen to
sudo nano /etc/defaults/isc-dhcp-server
and set the last line to equal your interface discovered above.
INTERFACES="eth0"
Next we set a range for the DHCP server to offer leases. You'll need to edit or create a dhcpd.conf file
sudo nano /etc/dhcp/dhcpd.conf
and put this at the end.
#default-lease-time 600;
#max-lease-time 7200;
option subnet-mask 255.255.255.0;
option broadcast-address 10.42.0.1;
option domain-name-servers 10.42.0.1;
subnet 10.42.0.0 netmask 255.255.255.0 {
range 10.42.0.2 10.42.0.202;
    }
Now any computer connecting to our server will receive a lease in the 10.42.0.0 range.
Redirecting With DNSMASQ
For the offline CCC workshops we need to redirect traffic on the LAN destined for ubuntu repositories to this machine.
Next let's install dnsmasq to
  sudo apt-get update
  sudo apt-get install dnsmasq
Time to edit dnsmasq.conf to check we have a directory to make our new configurations in.
sudo nano /etc/dnsmasq.conf
the final line should read
conf-dir=/etc/dnsmasq.d
Next create a new config file
sudo nano /etc/dnsmasq.d/archive.ubuntu.com
and add your redirection rules. These will cover the Australian ubuntu repositories and the security archives (which are not mirrored).
address=/*archive.ubuntu.com/10.42.0.1
Finally we need to make a link from our local web server to the apt-mirror location on the drive.
  cd /var/wwww/html/
  sudo ln -s /var/spool/apt-mirror/mirror/mirror.aarnet.edu.au/ubuntu/ ubuntu/
Now let's restart dnsmasq
sudo service dnsmasq restart
The ethernet port on the laptop is dedicated to serving this mirror, and can not be used for usual internet access. Use the wifi for this instead.
Change Repository
To make sure we can still access a repository for this machine we will change the sources for our packages to the main repository. You can do this using the Software and Updates in system Settings.
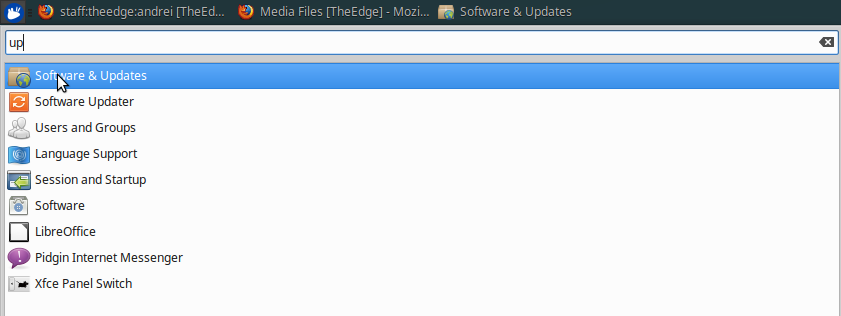
Change the download server to main.

Maintenance
As the facilitator laptop is the primary tool for running workshops it is important to keep it up to date. Here is a simple checklist:
Software Updates
- Run apt-mirror at lease once per month, with
sudo apt-mirrorThis will ensure that your local repo is up to date. Be aware that apt-mirror may pull down dozens of gigs at a time!
- Back up the apt-mirror folder to an external drive. It is located in /home/ccc/apt-mirror. Once again be aware that it will be big, about 200 gig.
- back up the wiki using the backup tool whenever big changes are made. You can download this backup to any device browsing the wiki.
Once you have built your server. The best way to learn is to dive straight in and start editing. Log in as an admin, click on the 'edit' link to open the editor and follow the built in instructions. There is a syntax guide available, and plenty of resources online.